
Reports · Troubleshooting
Choose the correct location for a report
A location can come from an object code, be entered in the form, placed on the map or found by your device with your permission. Check the shown place before sending; you can add an address yourself when automatic lookup fails.
Last reviewed:
On this page
Goal
Send a report with a location the responsible team can actually find.
Before you start
- The report form is open and you know the affected place.
Steps
Check an existing object link
If you came through a QR code, check the displayed object. The code may supply an object link and location.
Set the place yourself
Enter an address or place the point on the map. Device location is optional; allow it only if you want to use it.
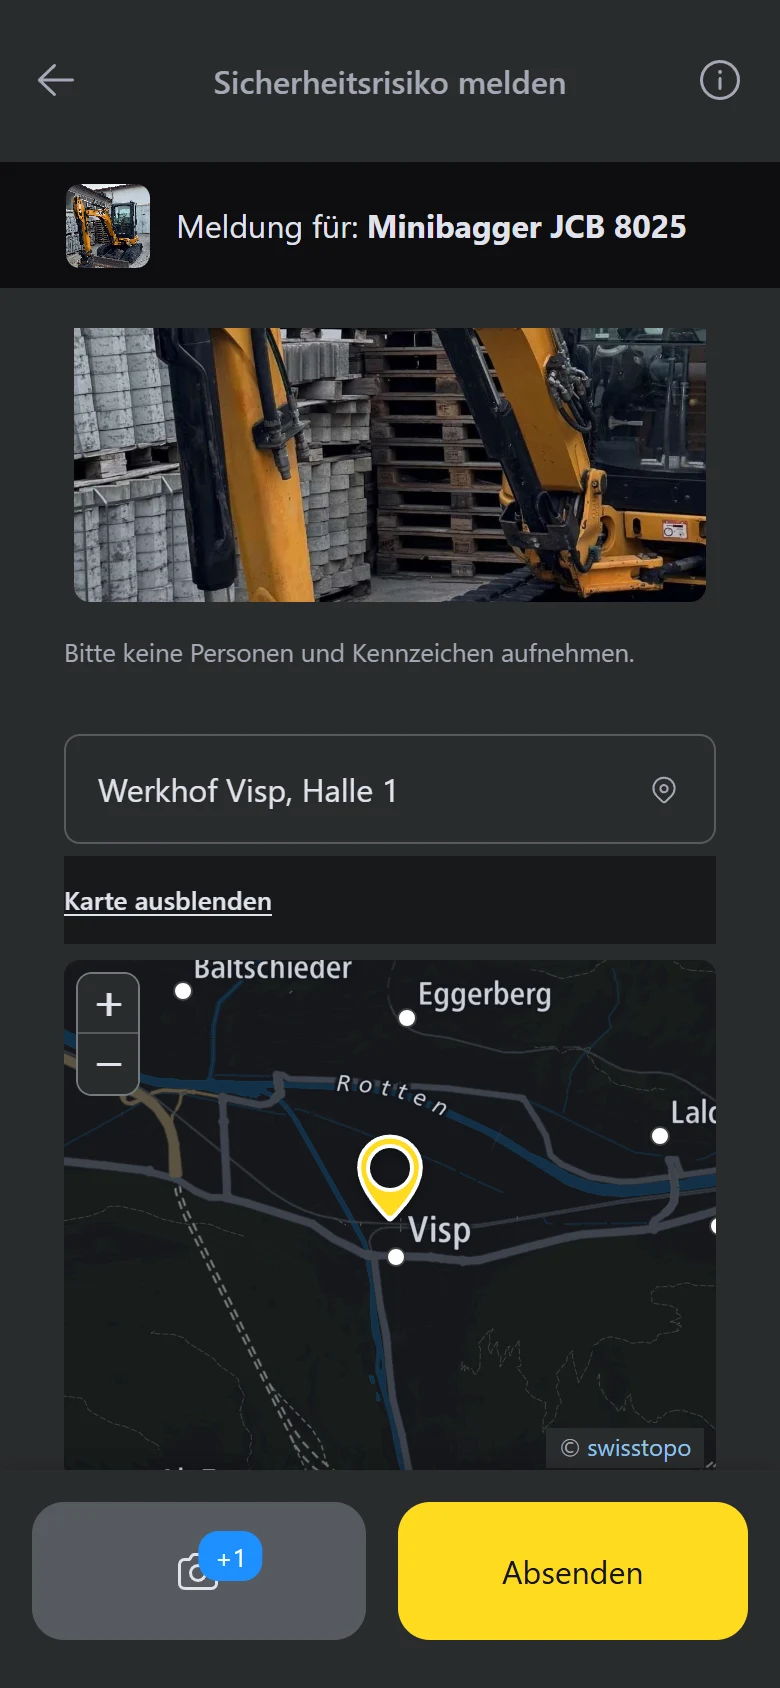
Example view with test data: «Auf Karte wählen» (choose on map) opens the report form's map; a pin marks the location, and «Karte ausblenden» (hide map) closes the view again. The title and appearance can differ by organisation.
Open image at full sizeReview before sending
Compare the location text and map point with the affected place. Correct either by hand if needed and add a short description of the spot.
Check the result
The report carries a checked location instead of an unverified automatic suggestion.
If something goes wrong
- Device location permission was denied or does not work.
- Type the place or set the point on the map. Device location permission is not required.
- Automatic address lookup finds no suitable name.
- Check the map point and enter the place yourself. Describe a recognisable nearby feature.
Common questions
Must I share my current device location?
No. You can choose the place in the form or on the map.
Is a location taken from my photo without asking?
No. If a photo contains location data and the location field is empty, the form asks before using it.